


Installation guide for todobarro’s tiles
Everything you need to know about installing our fired clay floors.
Download the complete todobarro flooring installation guide in PDF format
This document is intended to provide useful technical information for achieving optimal results when installing products from the todobarro catalog.
The recommendations in this document are based on the UNE 138002:2017 standard “General rules for the installation of ceramic tiles with bonding materials” and Proalso’s (Professional Association of Tilers) training manuals for becoming a Licensed Professional Wall/Floor Tiler.
Receiving material from todobarro
Open and check each package before laying it down, as claims for demolition or repositioning costs after laying will not be accepted under any circumstances.
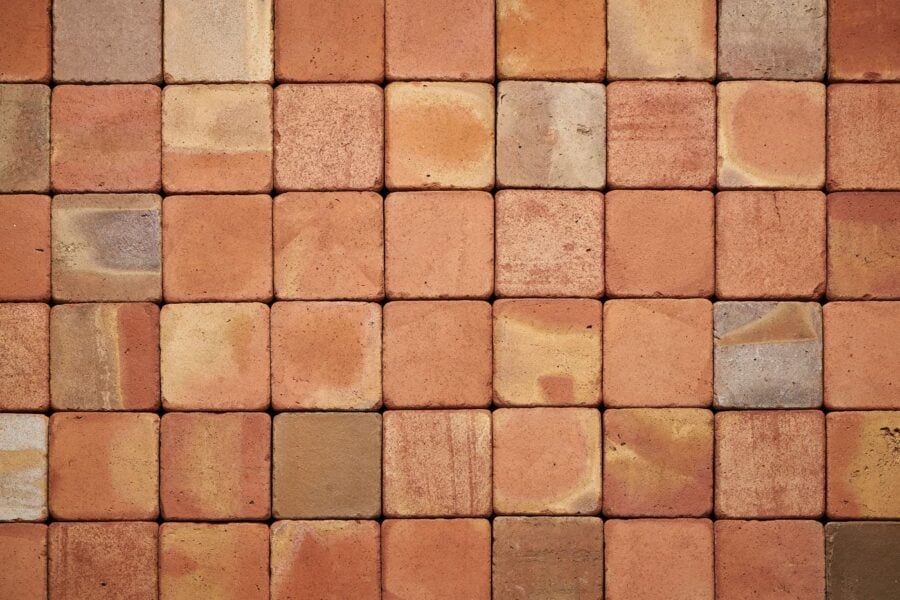
Please note that this is a product with tonal variation, so it is necessary to randomly mix tiles from different boxes before laying to create a uniform grading of hues over the entire surface of the flooring.
Natural fired clay tiles are known for their non-uniform, earthy colored body, irregular texture with grains, pores and pits on the surface that give them a natural, rustic and original appearance.
It is very likely that the material arrives humid, due to the last step of the aging process of the pieces. This can make you see a different tonality to the final one that will show the clay. It is even possible that saltpeter may appear on the surface, but this is not something to be afraid of, since when you carry out the final cleaning, following the indications of our cleaning and protection guide, saltpeter and possible remains of the installation will be eliminated.
Installation of terracotta tiles
If you have any doubts, stop laying the material and contact todobarro. Problems are always much easier to solve if the pieces aren’t yet in place! It is important to rely on qualified professional tilers for the execution of a quality work in each project and to ensure the optimization of the technical and aesthetic performance in the final result. Following the recommendations of this guide and taking into account the specificities of each project, the technical and aesthetic performance of the tiling will be guaranteed, so that the user can enjoy it with the warranted quality and durability.
The natural clay tiles in todobarro’s catalog are handcrafted products that require a correct prescription according to the intended use, a selection of suitable materials and a good installation, in order to be part of a fully functional ceramic system. In all cases it is necessary to read the manufacturer’s recommendations and the technical data sheets of all the products and materials used.
Ceramic systems
Ceramic systems are construction solutions with adhered ceramic tile coverings. A CERAMIC TILING SYSTEM is described as a set of layers with different functions and characteristics:
First layer
This is the supportive base of the system and is called the structural substrate. It is the element that supports all the other layers. It coincides with construction elements typified in the CTE, and it supports its own weight, the loads and stresses induced from other elements and the loads of use.
Intermediate layers
From an installation point of view, we can distinguish different intermediate layers, which can be grouped into the two following blocks:
(a) We have the layers that are executed to adapt the surfaces, and obtain a flat, stable, plumbed surface on vertical elements or leveled on horizontal ones, well cohesive and clean, and compatible with the ceramic tile installation technique. This block includes:
- screed
- regularization layer
- layer of layer’s distribution
- uncoupling layer
b) In second place we have the layers that add some specific function or additional performance to the ceramic system, such as:
- thermal and acoustic insulation
- waterproofing
- drainage
- vapor barrier
- radiant heating
If some of the intermediate layers mentioned above are to be installed, consult the particular installation instructions for these products.
Last layer
The fixing substrate is the last layer laid on top of the intermediate layers and will receive the bonding material (mortar or adhesive) to install the tiles.
It must be completely clean before starting the installation. The residues not removed will generate weak points of union that can be the origin of future detachments.
It is also necessary that the surface is perfectly dry (always below 3%), leveled and flat (less than 3 mm of deviation in 2 m, in any direction, are recommended). It must also have an acceptable cohesion (no chipping).
Water sensitive substrates (e.g. wood) may require a waterproofing primer. A suitable bonding material should be selected for these substrates.
The bonding material
A distinction can be made between traditional mortars and adhesives.
The grouting material
A distinction must be made between tile-to-tile joints and movement joints.
Taking into account the previous layers, we can make the following CLASSIFICATION of Ceramic Systems in which terracotta tiles can be installed:
Horizontal
- P1: Direct system
- P2: System with intermediate layers
- E1: System on natural pathway for pedestrian traffic.
Vertical
- R1: Direct system
- R2: System with intermediate layers
Download here the installation guide in PDF to see the sketches.
Tile-to-tile joints and movement joints
The following distinction can be made between the kinds of joints that can be placed in a floor or wall of fired clay tiles:
Tile-to-tile joints
These are defined as the physical separation between contiguous tiles, necessary to compensate for any dimensional deviations that the ceramic tiles may have and for the absorption of stressors. Tile joints allow for the easier repairing of individual tiles in the future.
Lay the tiles with a joint of at least 3 mm for small tiles and 5 mm and upwards for larger sizes.
Do not lay terracotta tiles without a joint or “butt joint”. A jointless tile installation contributes to the propagation from tile to tile of the stresses of the substrate and tensions due to expansion of the tiling, which can lead to lifting, detachment or cracking.
Movement joints
This is the physical separation of the ceramic tile in sections in order to absorb the stresses generated in the ceramic system. The sizing, location and layout of the movement joints must be established by the designer to suit the needs of each project. Movement joints can be classified as follows according to functionality and location:
Structural joints: they are arranged in edification dividing the structure to allow free movement of the parts. The expansion joint affects all the layers of the ceramic system and must be finished with special profiles or sealing agents.
The expansion joints of the ceramic tile only affect the thickness of the piece to subdivide the panels into smaller regular areas, with the intention of avoiding the accumulation of stresses derived from the expansions and contractions of the ceramic tile. These joints are resolved with prefabricated profiles or elastic sealants.
For the sizing of the expansion joints the following criteria will be followed:
- Exterior walls: (joint width ≥ 8 mm), spacing length 3-4 m and maximum regular area of 16 m².
- Interior floors: (joint width ≥ 5 mm), spacing length ≤ 8 m and maximum regular area of 40 m².
- Exterior paving: (joint width ≥ 8 mm), spacing length 2.5-5 m and maximum regular area of 16 m².
- Singular points: doorways and change of pavement.
The perimeter joints are arranged at changes of plane and at the limits of the areas to be tiled, in order to minimize the accumulation of stresses. In floors, it affects the ceramic tiling and the thickness of the mortar screed, while in walls it only affects the ceramic tiling. The recommended joint width is ≥ 5-8 mm.
Choosing the bonding material
As far as bonding material goes, we can distinguish between traditional mortars and adhesives, which we will describe below.
Traditional mortars
These are a mixture of one or more binders (usually cement and/or lime), some aggregate (usually sand) and water. It may incorporate other additives.
The use of tile installation techniques with traditional mortar as a bonding material is becoming less and less common, especially in renovation projects.
The UNE 138002 standard indicates the possibility of applying the tile installation technique with ceramic tiles using traditional cement mortar as a bonding material only in direct ceramic systems (R1 and P1, see previous section) and establishes a series of very specific limitations.
todobarro generally does not recommend using traditional mortars as a bonding material for the installation of handmade terracotta tiles, given the numerous limitations established by the same regulations.
Adhesives
These are all the types of bonding mortars defined in the UNE-EN 12004 Standard that are used in practically all possible situations. The standard distinguishes three types of adhesives within its classification. Consult the PDF guide here to see the explanatory infographics on adhesives.
Selection of grouting material
According to UNE-EN 13888 Standard, grouts for terracotta tiles can be of the following types according to the chemical nature of their binders:
- CG: cementitious grout. Two classes are distinguished: normal and improved. W: reduced water absorption; A: high resistance to abrasion.
- RG: reactive resin grouting material.
The choice of the type of grout to use will depend on the intended use of the terracotta tile surface and the width of the joint to be filled. It is a good idea to consult the grout manufacturer for the most appropriate type of grout in each case.
It is most common to use white or gray grouts, but you can use colored materials, depending on the color of the tiles, or to contrast with them. We recommend that you spend some time trying out the different options, you will see how the appearance of your room changes depending on the color of the grout.
In any case, do not use materials colored with black carbon (micronized carbon), as the residues they leave on the tiles are very difficult to clean.
As a general rule, you can use traditional cement mortar grouts for natural clay floors. Those of gray cement and sand or white cement (with or without dye) and white sands will be valid. The latter will be chosen according to the project criteria.
Laying of tiles
In order to ensure a correct execution and the final quality of the tiling with natural clay tiles by adherence, careful planning of the processes is required. Good overall planning guarantees the start and sequence of the tile installation work without interruptions or waste of materials, as well as higher performance.
Environmental conditions for the application of the materials
While the installation of the tiles takes place, the ambient temperature and humidity, as well as exposure to sun, wind and rain, should not reach levels that affect or influence the characteristics of the substrates and the performance during the application and curing of the bonding and grouting materials.
In general, terracotta tiles should not be laid when the temperature of the air, supportive layers or materials is below +5 °C or above +35 °C.
Outdoors, tile installation should not be carried out in adverse weather conditions (rain, snow, wind). Special care should be taken to avoid the presence of humidity, rain or risk of frost during outdoor tile installation and in the first 48 hours after completion, in order to avoid negative consequences on the setting of the adhesives.
General planning and staking out the space to be tiled.
First of all, check that the moisture, cohesion, stability, flatness and levelness of the installation surface are adequate.
Do not start the tile installation if these surface characteristics are not correct, because the result can be disastrous and very difficult to correct.
Make a thorough, deep cleaning of the installation surface. This is essential. Remove all traces of plaster, grease, wax or release agents, mortar sticking, cement slurry, organic matter and dust.
Any residue that is not removed can reduce the adhesion of the adhesive and cause future detachment of parts.
The task of staking out the area to be tiled prior to the beginning of the installation work is an essential operation for the technical and aesthetic quality of any ceramic tile and becomes even more important when there are combinations of pieces in one composition.
Properly staking out each project helps to simplify tile-cutting, avoid having to make substitutions and corrections, resolve singular points and meeting points, minimize wasted material, improve performance, and avoid narrow strips, asymmetries and incorrect optical effects.
The general layout of the space to be tiled should be carried out after the deep cleaning, but before collecting the materials and beginning the organization of the cuts, as a step prior to installation.
The task of staking out consists of the selection of the tile joint pattern and its combination or arrangement in a specific way, taking into account the tile-to-tile joint and adapting it to the limitations imposed by the surface to be tiled by making an exact calculation of its distribution.
The project’s specifications should include the data relating to the width of the tile-to-tile joint and the layout of the joint pattern, in addition to the location of the corresponding movement joints. However, in the absence of a project for renovation and restoration work, it is the installer who must carry out the layout work.
Staking out the area should include the following steps:
- Verification of all the measurements of the space to be covered, including the openings and available width in the deliveries to carpentry.
- Staking out of levels, plumbing of walls, flatness, verification of openings and conditions of the supports.
- Arrangement of the layout of the joints according to the real measurements of the surface to be covered and the foresight of movement joints.
- In case of projects with certain complexity due to the shapes of the fixing surface or the combination of different types of shapes and colors in the tiles, it is recommended to make a sketch to scale 1:50 with the dimensions and arrangement of the pieces. You can even make a preview of the pieces to get an idea of the final appearance.
- Selection of the layout of the joint pattern according to the dimensions checked in order to avoid narrow strips and/or small points (bevel laying) and to use as few tile cuts as possible. For a square format, a narrow strip is considered to be any tile with a side less than half the format.
- It is important to mark the laying lines with a line marker, thread or laser, every two or three rows to maintain controlled alignment.
- In case of laying combinations of pieces and formats in tessellation modules, it is highly recommended to mark the grids corresponding to each module on the surface to be coated, in order to adjust the regularity during the tile installation.
- Inspection, cleaning and protection of pre-existing structural joints. Layout of the movement joints and planning of the joint execution works.
The result of these dimensional control operations makes it possible to safely carry out the stockpiles, to stake out all the surfaces with respect to the distribution of the joint pattern and to foresee the cutting and handling of the tiles.
Failure to set out the layout results in significant deviations and irregularities in the pattern, which are considered to be defects in the tile installation.
Finally, organize all the necessary tools and materials, and the tiles inside the room, in order to work in an orderly and comfortable manner. It is a good idea to distribute the tiles around the room, so as not to have to make continuous trips as the installation progresses. This process allows a better review of the material and a good distribution by color gradients. This way you will get the best effect by distributing the shading and giving a better effect by the uniqueness of the pieces as they are all slightly different.
Adhesive preparation
Before laying the tiles, the adhesive must be prepared according to the manufacturer’s instructions in order to guarantee optimum performance.
First of all, some preliminary checks should be carried out on the stock of the adhesives supplied, including:
- Check the shelf life and expiry date of the cementitious adhesives. The time of conservation or storage in the conditions recommended by the manufacturer to conserve their properties intact is essential.
- The date of packaging or manufacture should be indicated on the packaging.
- Check that the packaging of the adhesives is in perfect condition.
- Check the absence of hard granules or lumps in the powder in cementitious adhesives that indicate partial hydration of the cement and therefore that the material is unusable.
Performing a mixing operation properly is of vital importance to obtain the desired performance for each type of product. To do this we must:
- Respect the mixing ratio in liters of water per container proposed by the manufacturer.
- Always pour the powder content of the container over the water deposited in the mixing container, following the manufacturer’s instructions.
- Select the type of mixer recommended by the manufacturer and suitable for the amount of adhesive to be mixed.
- Mix at low rotation speed until a homogeneous mass is obtained and avoid air occlusion.
- The result should be a homogeneous mass, of creamy and uniform texture, free of lumps.
- Wait the maturation or resting time established by the manufacturer after the first kneading and then proceed to a brief final mixing of the adhesive.
- Once the kneading operation is finished, DO NOT rectify the mixture and DO NOT add additional water during the useful life of the kneaded adhesive.
Selection of the bonding material application method
In this guide we shall focus on the tile adhesives specified in Standard UNE 12004, since they are the ones that are used in practically all possible situations, especially in refurbishment and renovation.
The adhesive application method is decisive in guaranteeing technical performance, adhesion, and avoiding possible pathologies related to its incorrect application.
Simple gluing method
This method consists of spreading the adhesive on the fixing surface and then combing it with the specified notched trowel in a straight line, without making any circles, until a regular layer of uniform thickness and flatness is obtained.
In order to apply the adhesive in this way, a surface with a flatness of less than 3 mm on a 2 m rule is required. Otherwise, a previous regularization must be carried out.
The adhesive layer should never be used by increasing the thickness or applying lumps to compensate for deviations in the flatness of the substrate, since the result would not be a layer of uniform thickness.
It is very important to perform this operation in the shortest possible time and on a reduced surface to avoid exceeding the maximum exposed time of the adhesive, especially outdoors and in adverse environmental conditions.
The simple gluing method should be applied in all cases of tile installation with any type of ceramic tile. In the cases indicated in the following section, double-gluing should also be used.
Double gluing method
The double gluing method is used in certain situations to improve the wetting of the tile, favoring a homogeneous contact on the entire surface of the reverse side with the aim of generating an optimum and lasting adhesion.
The double bonding method consists of applying the adhesive specified for single bonding on the substrate by combing the adhesive with the appropriate notched trowel with the grooves in a straight line and applying an additional thin layer of adhesive on the back of the tile by spreading the material with the smooth side of the trowel.
This contributes to a better contact between substrate and tile without increasing the final thickness of the adhesive layer, which should not exceed the recommended maximum.
Never apply in globs (on the supportive base or on the back of the tile), nor should it ever be double glued by combing with the same notched trowel on the back of the tile (either in the same direction or in the opposite direction). An excessive layer of adhesive causes differential shrinkage and a decrease in the adhesion and performance of the adhesives and leads to subsequent complications.
In the case of our tiles, it is generally considered highly advisable to use the double bonding method, and to use it always in exteriors, on floors with radiant heating or if expressly specified in the project.
The application of double bonding is also a good practice that protects and contributes to reduce stainability and the risk of efflorescence in very porous materials such as terracotta tiles.
Cutting and drilling operations
Cutting and drilling operations on natural clay tiles are carried out in the same way and with the same tools and technology as any other type of tile. The success of the cutting operations depends to a great extent on the correct layout carried out beforehand, since it avoids narrow strips and pieces with geometries that are difficult to manufacture or that cause additional stress on the ceramic tile. For example, L-shaped pieces with narrow strips, manholes or drains in an area close to the perimeter of the piece, etc.
Applying the adhesive
The tile installation with adhesives for ceramic tiles should be carried out bearing in mind at all times the application characteristics of the adhesives used (open time, useful life, maximum application thickness, etc.), as well as the manufacturer’s instructions contained in the corresponding technical data sheets/specifications.
The laying process of natural clay tiles should follow the following guidelines:
- It is recommended to wet the terracotta tiles prior to installation.
- Before proceeding to the gluing of the pieces, it is necessary to verify that on the back of the tiles does not remain any type of construction materials, which must be removed to avoid that the adhesion is affected by this layer of dust.
- To lay wall tiles of formats smaller than 20×20 of low thickness, select a trowel of approximately 8 mm.
- Spread only enough adhesive to allow the tiles to be laid within the open time period of the adhesive, i.e. before a non-stick surface film forms on it.
- Using the notched part of the trowel, spread the adhesive on the support, always in a straight line, perpendicular to an edge of the tile, parallel to the shortest side.
- When specified in the project, or in the cases established in the previous section, the double-gluing technique must be used.
- Place the tile more or less in its final position, taking into account the width of the joint.
- Move the tile, perpendicular to the grooves and in the opposite direction to the adjacent tile, a distance equivalent to the width of the notched part of the trowel.
- Move the tile back in the opposite direction to its original position, adjusting its location with respect to the adjacent tiles and the joint. Placing the tiles on the layer of adhesive using this reversible sliding movement flattens the adhesive beads, allows air to escape and promotes better and more complete contact of the adhesive with the ceramic tile, improving the wetting capacity.
Execute of the tile-to-tile joints
The grouting operation is the final phase of the execution of a ceramic tile. The final appearance and its durability depend largely on the correct preparation, application of the material and subsequent cleaning.
In the case of terracotta tile coverings, the importance of the joint is even more relevant.
The joints between tiles are required to have a uniform texture and color, absence of cracks and efflorescence and the least possible maintenance throughout the useful life of the covering.
Before proceeding to grouting, we must ensure the appropriate preconditions:
- The joints must be dry, free of disintegrated materials and free of adhesive, at least 2/3 of the thickness of the tile, and the thickness of the filling must be as homogeneous as possible for the entire ceramic tile.
- The crossheads and other plastic separation devices between pieces must be removed before starting to fill the tile-to-tile joints.
The application of the grouting material must be carried out according to the manufacturer’s instructions.
The grouting operation must be started after the grouting time indicated by the manufacturer has elapsed after the tiles have been laid and in controlled environmental conditions.
It is recommended to moisten the pieces before applying the grout.
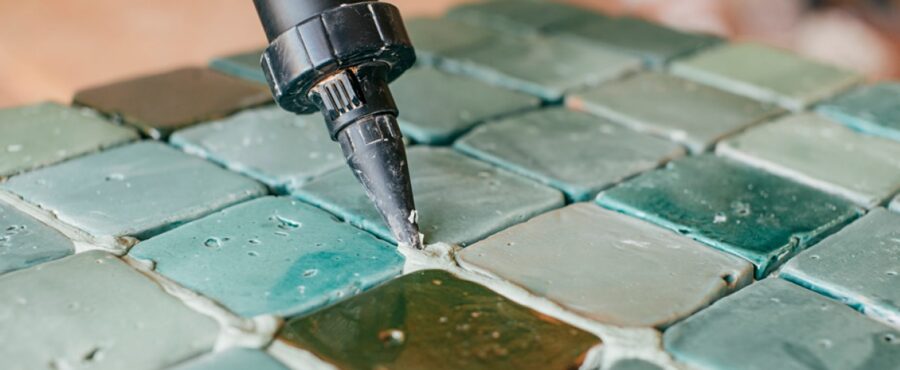
It is recommended to use caulking guns to fill the joints.
With the help of a grouting trowel or equivalent tool, the excess material can be removed, while filling and pressing the material uniformly throughout the depth and length of the joint. With this intervention, the curvature can be equalised and the final relief and texture can be provided.
If grouting materials of a contrasting colour are used with respect to the tiles, it is recommended to carry out a prior test to check the ease of cleaning the surface.
Cleaning the grout
The cleaning operation of the grouting material is essential for a good finish. Once the joints have been filled, the entire surface of the covering must be cleaned with water.
For cementitious grouting materials, the time proposed by the manufacturer must be respected for starting cleaning. The environmental conditions must also be assessed. In the case of terracotta tiles, the behaviour of the grouting material must be verified, since the absorption of the clay is high (>10%) which can dehydrate and prematurely dry the mixture of the applied material. For this reason, it is recommended to moisten the tiles beforehand.
The cleaning operation can be started when it is verified by touch that the material does not stick to the fingers when touched.
The first wet cleaning operation has the function of roughening the grouting material, shaping the profile of the joint and favouring the hydration of the cement, something very important in very wide joints.
Cleaning should be done with sponges of suitable stiffness, moving them diagonally to the joint pattern or in circular movements.
Avoid dragging the material from the surface of the joint, which causes excessive emptying of material from the inside of the joint.
The sponge should be rinsed and wrung out with each pass and the rinsing water should be renewed frequently.
It is important to wring out the sponge and avoid adding an excessive amount of water to the joint, which would cause it to soften and subsequently drain.
Wet cleaning is recommended in controlled phases when the joint begins to dry to avoid premature hardening and changes in color tone.
The success of this first cleaning will determine the greater ease of final cleaning of the coating and will prevent the persistence of hardened materials on the surface.
Finally, a second pass will be made after the first rough cleaning. It will be done with the sponge wrung out diagonally to the joint pattern in a straight line and passing only once in each section.
After each application, the sponge should be cleaned in the bucket and wrung out again, and as before, the water should be changed periodically. If temperatures are high, it is recommended to slightly moisten the floor to help the grouting material set.
It is advisable to finish the grouting task of an entire room with a final fresh cleaning with clean water applied with a well-wrung mop or similar.
After the final cleaning process, it is important to respect the commissioning time, especially on floors.
The good results of grouting and subsequent cleaning must be complemented with FINAL CLEANING OF THE WORK as detailed in todobarro’s Cleaning and Protection Guide.
Some general observations
Frost resistance
The resistance to frost-thaw cycles of ceramic tiles is a characteristic required only in outdoor locations with a risk of frost. Passing the frost test according to UNE EN 10545-12 Standard is a minimum requirement but not sufficient to ensure durability against this phenomenon.
The frost resistance of a ceramic covering cannot be solely based on a correct selection of ceramic tiles. In addition, at least the following execution conditions must be met:
- 100% solidification of the tiles.
- A drainage or waterproofing system must be provided to prevent saturation of the screed layers and the back of the tiles.
- The movement joints must be increased, which will prevent the covering from opening and water from penetrating into the intermediate layers.
- Use grouting material with low water absorption.
- In wet areas and/or areas with a risk of frost, pavements must be built with slopes of at least 1.5% to avoid water pooling and sufficient drainage and sewer systems must be provided to evacuate the expected water.
Joining point of the clay tiles / ground
In clay systems built on a screed made on the ground (e.g. sidewalks, paths, etc.) the penetration of water through the lateral surfaces of the paving system implies serious risks to the durability of the system itself, attributable to the persistent humidity in the screed. In these cases, it is recommended to waterproof the contact surface between the support/screed of the pavement and the ground. Adequate drainage of water that can penetrate under the ceramic cladding must be foreseen.
Download the complete todobarro flooring installation guide in PDF

Top stories

What is the Nature Restoration Law?
The Nature Restoration Law is a European regulation approved in 2024, aiming to ensure the necessary actions and initiatives to repair damaged ecosystems and…
Acequias or irrigation ditches: an ancient knowledge making its comeback
“Acequias” (ditches) are one of the oldest existing systems of channeling and use of water. In the Iberian Peninsula we know them well: the…
What is a compensatory measure?
By definition, a compensatory measure is an action aimed to restore or repair de negative environmental impact of any give activity -usually of a…
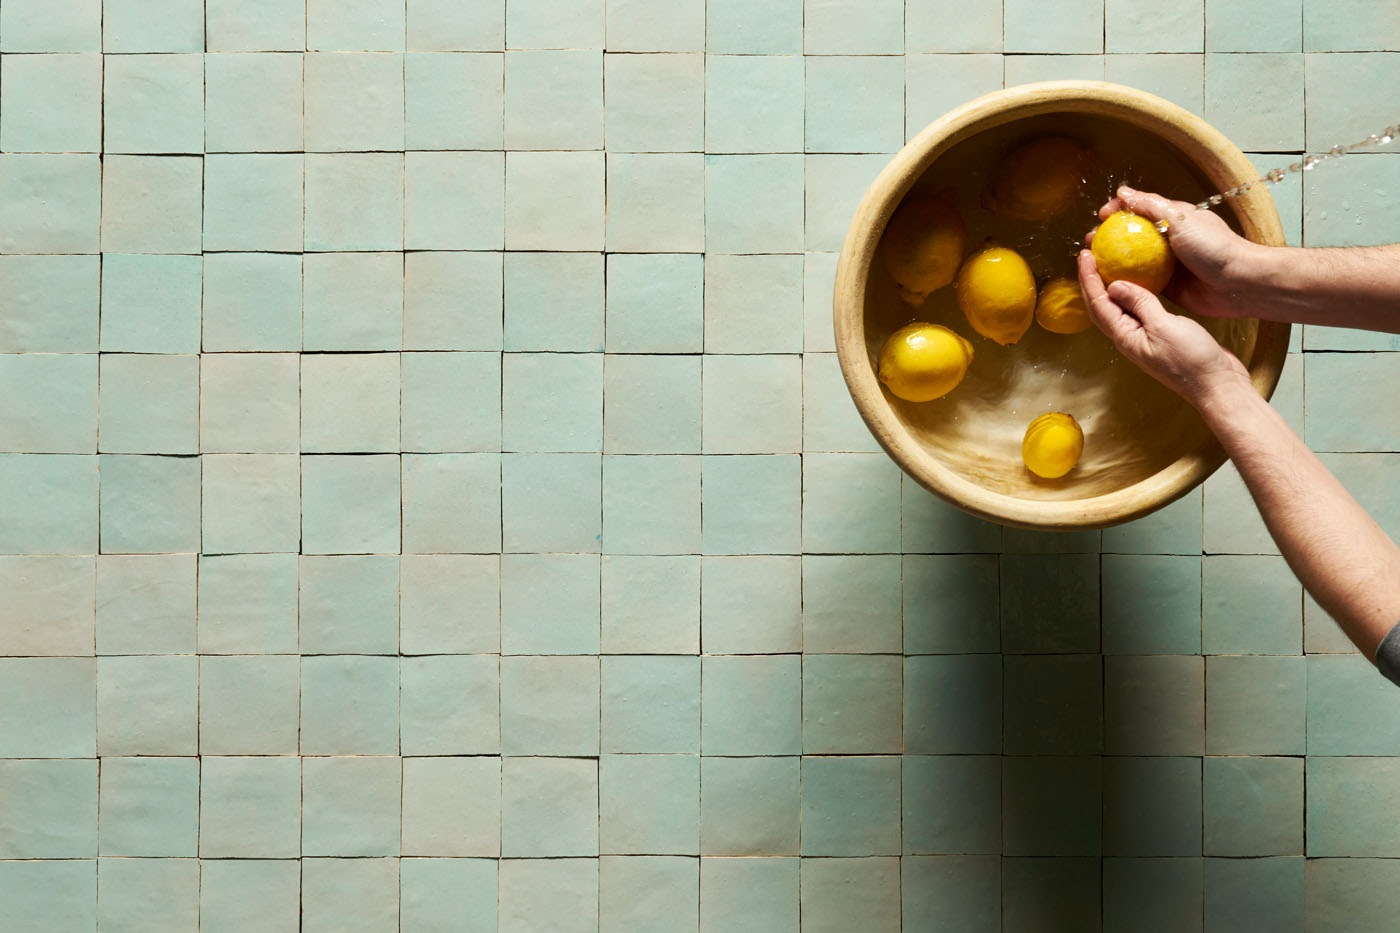
What are Zellige tiles?
The word zellige means ‘polished stone’ in Arabic. It refers to a type of traditional tile and mosaic technique characteristic of Morocco and the…
